Sunday, January 23, 2011

How to Saute' Chicken

From: Rochelle

Okay, this seems like a simple thing. Everyone has probably done it, right? But last week at this conference I went to, we learned from a chef a way to saute' your chicken the "professional" way. I thought I would share. I tried it and it tastes dang good!

How to Saute' Chicken

Step 1: Thaw chicken breasts.

Step 2: Pound your chicken to one even thickness.

Put your chicken breasts between layers of plastic wrap. Get a hammer or you can get a meat hammer and pound the chicken to one even thickness. This makes it so that the chicken will cook evenly and be done at the same time. It will also help keep it juicy and tender.


Put between layers of plastic wrap.

Pounded chicken breasts.
 Step 3. Coat with seasoned flour.

Put about 1/2-1 cup of flour on a plate and sprinkle some salt and pepper in it. Lightly coat the chicken breasts in the flour. This will help give the chicken a light "crust" which reminds me of the chicken you would find a Olive Garden.
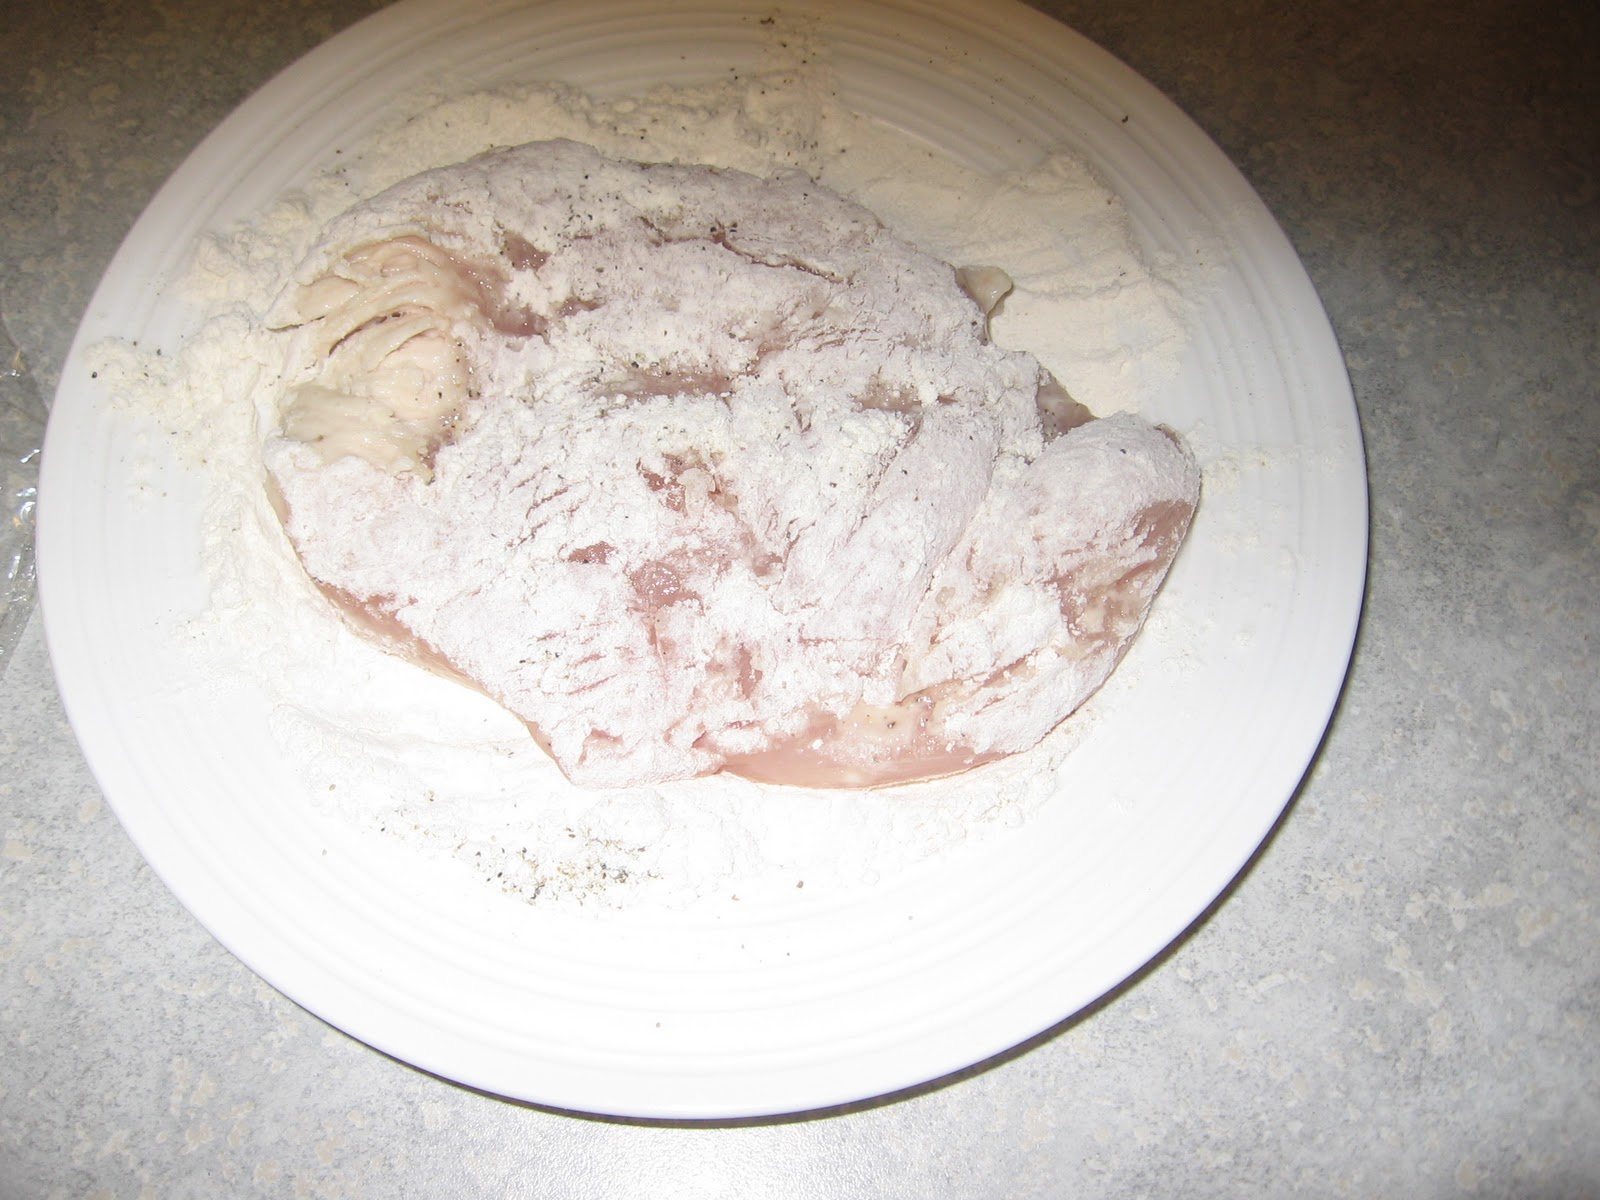
Coat chicken breast in seasoned flour. 
 Step 4: Heat pan and put a few tablespoons of butter in it.

I know, butter, so much for being healthy right. But I used Smart Balance if that is worth anything. It really makes a big difference to the flavor. Oh my goodness, I think it is worth it.

Step 5: Place chicken breasts skin side down (the smoother side).

If you place the skin side down, it will help keep your chicken tender. Don't flip your chicken until it is browned. You can tell when it is ready to flip when the chicken starts turning white around the edges.
Brown skin-side first

  Step 6: Flip the chicken breasts.

You might need to add a little bit more butter to the pan. Keep chicken on this side until chicken is no longer pink in the middle. The less you cut or prick your chicken the more tender it will be because the juices will not leak out.

Step 7: Let Chicken rest for a few minutes.

Letting the chicken rest also help it to retain it's juices. This is true with any meat. If you cut your meat right after it has been cooked, all of the juices will flow out. If you let it sit, those juices will be absorbed back into the meat making it juicier.
Let chicken rest for a few minutes.
 You can eat this chicken as is, OR you can cut it up and add it to your favorite salad, pasta dish, etc.  You can also deglaze the pan with chicken stock, add some flour and butter, then add more chicken stock and seasonings and make a pan sauce to put over the chicken.

The few extra steps are worth it, I think, because I love how the chicken has a little crust to it and it is to juicy! I few tips to take the basics up a notch.

Tuesday, January 4, 2011

Spicy Apple Muffins

From: Rochelle

This is another recipe from my wonderful cousin Natalie. Natalie and I were made in the same mold, I swear. We don't look alike but inside we are exact copies of one another! Anyway, Austin and I wanted something new for breakfast so we decided to make this yummy muffins! The spices in these muffins remind me of the fireplace and warmth and the sweet glaze kisses the top of each muffin. SO good!


Natalie's Spicy Apple Muffins

1
Egg
1/2 C
Milk
1/4 C
Vegetable Oil
1 1/2 C
Unsifted Flour ( I used whole-wheat)
1 1/2 t
Baking Powder
1/4 t
Salt
1/2 C
Brown Sugar- Packed
1 t
Cinnamon
1/4 t
Nutmeg
1 C
Apple-Peeled & Finely Chopped
1/2 C
Raisins (optional)
1/2 C
Chopped Nuts (Optional)

Beat egg and stir in oil and milk. Blend together next 6 ingredients. Stir into egg mixutre until flour is moistened. (Batter will be slightly lumpy.) Stir in fruit and nuts. Fill greased muffin tins 2/3 full. Bake at 400 for 20-25 minutes. While still warm drizzle glaze over tops.

Glaze:
1 C
Powdered Sugar -Sifted
1/4 t
Vanilla
4 t
Hot Water
Mix together 1 cup sifted powdered sugar, 1/4 tsp vanilla extract and 4 tsp hot water.


We made our muffins in a really cool muffin tin given to us at our wedding from one of my previous roommates, Kristen. I believe she got it from Ikea. They also sell the liners for their pan. It makes these skinny, tall muffins which are super cute! 

Fun Muffin Tin from Ikea. 

Grandma's Dinner Rolls

From: Rochelle

This recipe is actually from my Grandma. She submitted this to the Family Cookbook. I thought I would try it out because I LOVE Grandma's rolls. I doubled the recipe and made a few tweaks, but they are SO yummy! We have gobbled almost all of them up and it as only been 3 days!

Grandma's Dinner Rolls
Makes 2 dozen large rolls


1 1/2 C Warm Water
2 Pkgs Yeast
1/2 C Sugar
1/2 C Honey
2 t Salt
2 Eggs
1/2 C Egg Substitute
1/2 C Butter
1/2 C Oil
4 C White Flour
4 C Whole-Wheat Flour

1. Combine water and yeast to dissolve.
2. Stir in sugar, honey, salt, eggs, butter,oil, and half of each kind of flour.
3. Add the rest of the flour and mix until smooth. It will be sticky but you can still handle it.
4. Shape in balls for rolls and place on cookie sheet greased or with parchment paper.
5. Bake at 400 degrees for about 12-15 minutes or until golden brown.


This are so tender and yummy! Austin and I like taking a fried egg and a slice of lunch meat and making a breakfast sandwhich. They would be perfect for a Sunday dinner or potluck. We would have these at Sunday dinners at my Grandma's. I love them!

Thanks Grandma!

Easy Baked Cheese & Vegetable Twist

From: Rochelle

Austin and I ate this tonight and it was WAY yummy. For one of my classes last semester I had to make a family cookbook. My cousin, Natalie gave me this recipe. I tweaked it a little based on the veggies we had on hand, but it was WAY good! It is also prefect to take to work, school, etc. for a lunch!


Natalie's Easy Baked Cheese & Vegetable Twist

2
Eggs
4 oz
Cream Cheese- Softened (I used the low-fat kind)
1/2 C
Italian Three Cheese Blend- Shredded
3 C
Frozen Broccoli Cuts-Thawed, Drained
1/2 lb
Fresh mushrooms- cut into quarters*
1/2 C
Cherry Tomatoes-Cut in half*
4
Green Onions- Sliced*
2 (8 oz) Cans
Refrigerated Crescent Dinner Rolls

Heat ovent to 375 degrees. Mix first 3 ingredients in large bowl until will blended. Stir in next 4 ingredients. Unroll crescent dough; separate into 16 triangles. Arrange in 11-ince circle on parchment or foil lined baking sheet, with short sides or triangles overlapping in center and points of triangles toward outside.


Spoon cheese mixture onto dough near center or circle. Bring outside points of triangles up over filling, then tuck under dough in center of ring to cover filling. Bake 35 to 40 mins. or until crust is golden brown and filling is heated through.

*I replaced the mushrooms, tomatoes, and green onions with 1/2 a sweet bell pepper and1/4 of a regular onions in addition to the Broccoli. I also added 2 T of Italian dressing, a little bit of turkey, and salt and pepper to the mixture. 

Thanks Natalie! This was SUPER yummy! 

Double-Layer Pumpkin Pie

From: Rochelle

We made this over the Christmas break and oh, man was it good! I throughly enjoyed it! It isn't really a pie, it is more of a pudding or a custard, or even like a cheesecake and is served cold. You actually don't even bake this. This is probably one of my favorite pumpkin desserts because it is creamy and smooth. Here is my ALL-TIME-FAVORITE Pumpkin Pie:


Home-made Pumpkin Puree
First, we made our own pumpkin puree. Right before Halloween, the Farmer's Market had their Sugar Pumpkins for $1. Steal! So I grabbed 2 of them. One we used for Thanksgiving and other we saved for Christmas. We just cut the pumpkin up, cooked it in a glass dish with about 1 inch of water, covered with plastic wrap. We cooked it for about 10-20 minutes until the flesh was tender and peeled away from the skin. We then scooped out the pumpkin flesh and threw it in the blender until it was smooth. Then we let it sit for an hour or two to get the extra moisture out. You can even set it in the fridge and let is drain overnight in a sieve lined with strong paper towels or cheese cloth. If you don't want to make your own pumpkin puree, you can just buy it but $1 versus $4-5 for a can . . . you decide.

Home-made Pumpkin Puree
Then we did the recipe:


Rochelle's Double-Layer Pumpkin Pie
10 servings
4 oz
Cream Cheese-Softened
1 C
Milk
1 T
Sugar
1 T
Milk
1 (8 oz) Tub
Cool Whip (Thawed & Divided)
1
Graham Cracker Curst
1 (15 oz) Can
Pumpkin
2 pkg
Jell-o Vanilla instant pudding
1 t
Ground Cinnamon
1/2 t
Ground Ginger
1/2 t
Ground Cloves

Mix cream cheese, 1 tablespoon milk, and sugar. Stir in half of whipped topping and spread in crust.

Pour 1 cup milk in bowl and add pumpkin, pudding, and spices. Beat with a wire whisk 2 minutes until blended. It will be thick. Spread over pumpkin layer.


Refrigerate for 4 hours or overnight. Garnish with whip cream and refrigerate leftover. 


*We tried making it a few days ahead and then froze it, but we decided we liked it better thawed. I wouldn't freeze it until you REALLY had to. 


Swedish Taffy Creams

From: Rochelle

So for Christmas, I made cookies to give to our neighbors. I remember making these Swedish Taffy Creams with my mom and LOVING them. I really like them because they are such a unique cookie and hardly anyone has heard of. They just aren't made that often. Just a warning, other than the oats, there isn't much that is healthy about these cookies, but they are good!

Swedish Taffy Creams
Cookies:
1 C   Butter
1/3 C   Sugar
1/3 C   Milk
1/3 C   Dark Corn Syrup
1 1/3 C  Oats
1 1/2 C  Whole-Wheat Flour
1 t    Baking Powder
1 t   Vanilla

Preheat oven to 350 degrees. Melt Butter, add remaining ingredients and mix. Drop by teaspoons (I made mine bigger, but these are good as LITTLE cookies too), at least 2 inches apart on a well greased cookie sheets.

Bake 10-12 minutes, then let cool for 2 mins. Put two cookies together with filling or cool whip.


Filling:
1 T Flour
1 T + 1/4 C Sugar
2/3 C Milk
2   Egg Yolks or 1 Egg
1/2 C Butter

Combine flour and 1 tablespoon sugar in saucepan. Gradually add milk and egg, mix well. Cook over low head, stirring constantly till boils and thick. Cool. Cream butter with remaining sugar. Gradually add flour mixture, beating well after each addition.


Make about 12 large cookies or 25 smaller cookies.
Related Posts Plugin for WordPress, Blogger...